Give Your Gun a Custom Look with Bastion Gear Laser-Etched Parts

How to install Bastion Gear slide back plate and magazine baseplate

How To Add Custom Backplates And Magazine Wells to Your Handgun

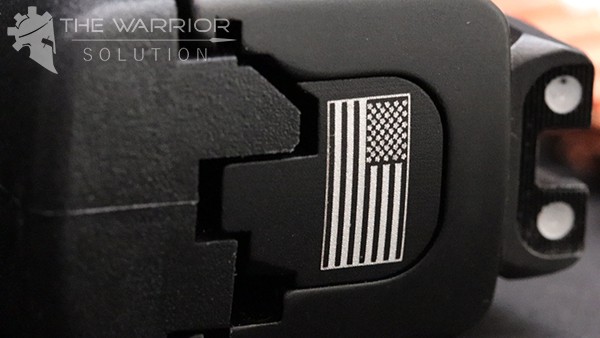
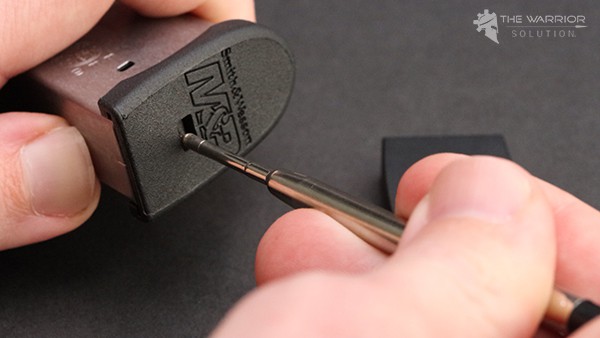
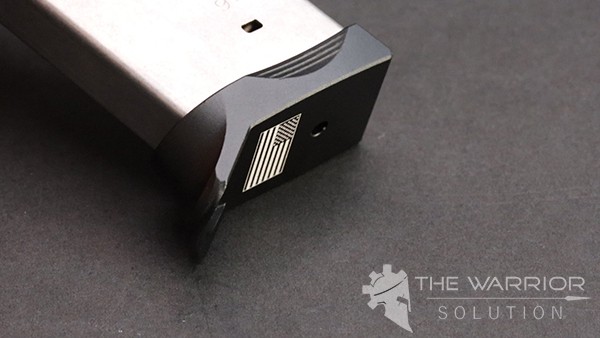
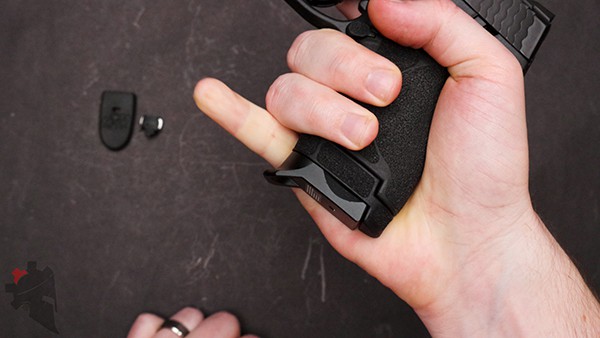
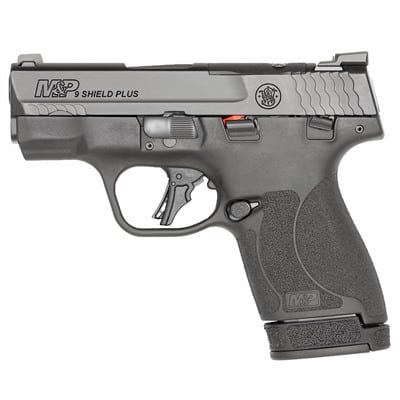
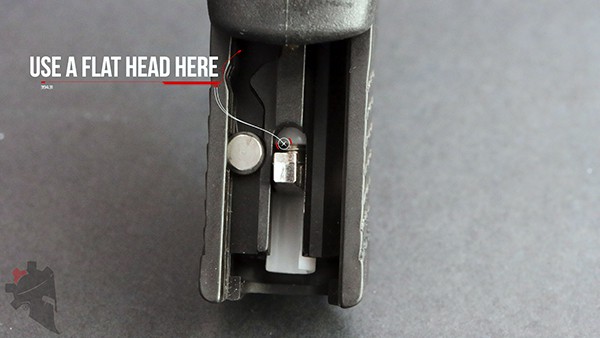
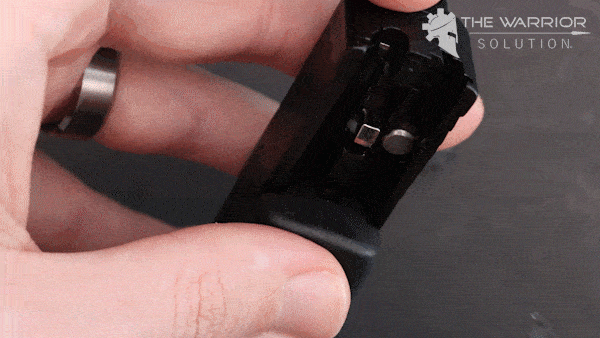
I have a great relationship with Bastion and have worked with them on several projects over the years. I took most of their product photography shots on their website. I also produced the Braza promo video on their site and Amazon. 

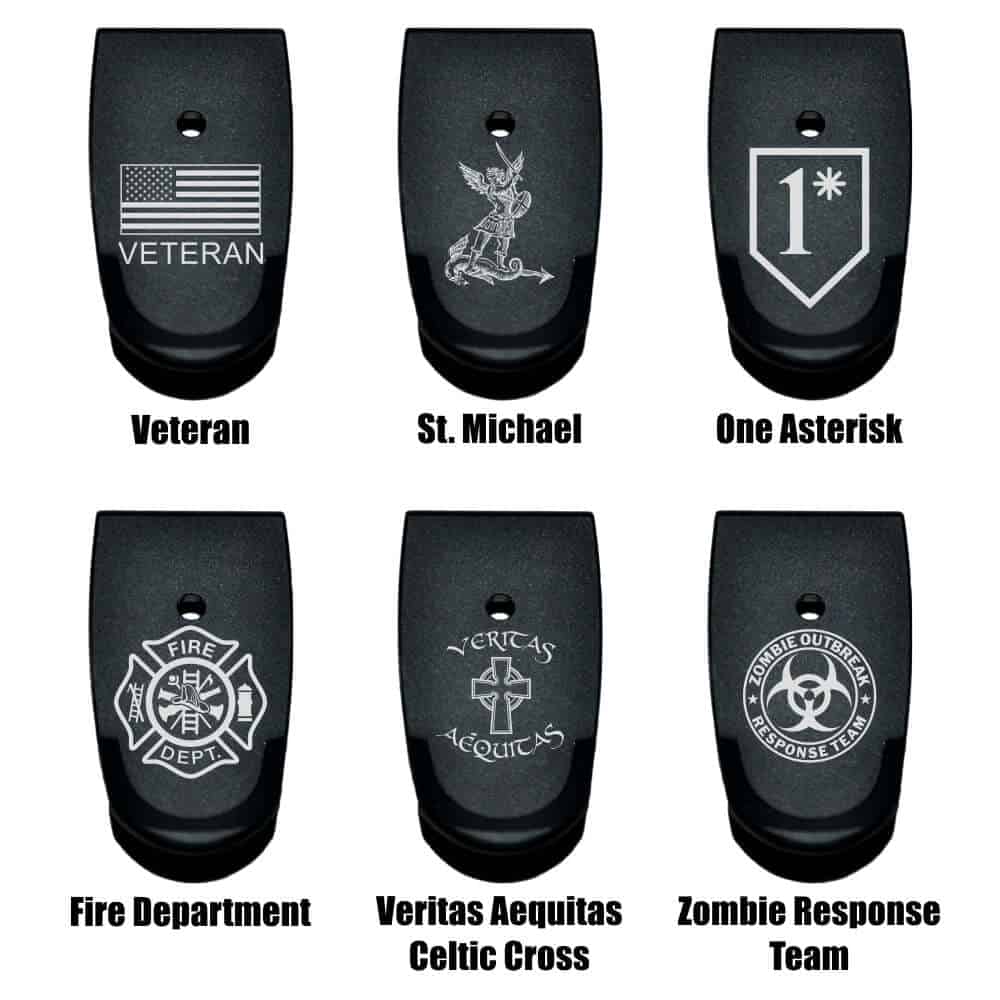
Bastion sent these parts along with basically everything else they make to me for paid product photography. I was not paid to review them or say anything positive or otherwise about them. The links to Bastion Gear’s website from this page, as well as the accompanying YouTube video, are affiliated with Bastion Gear, which means I receive a small commission on any purchases you make but it has no effect on the cost to you. I also have a Bastion Gear discount code: WARRIOR20 for 20% sitewide at bastiongear.com.

All links are affiliated with Bastion and other brands, including Amazon. As an Amazon Associate, I earn from qualified purchases. 

Customizing your guns is always a lot of fun.  You can go from very easy mods all the way to a 100% custom build. Depending on the size of your budget, experience level, and time available, you can put together some truly unique one-of-a-kind builds that reflect your personal style and preferences. 

If you don’t have a whole lot of the assets I just mentioned, Bastion Gear makes some really high quality, laser-etched custom parts that take all of about thirty seconds to install and don’t require any special tools or gunsmithing knowledge. You can change the overall look and feel of your guns with several different options for pistols, as well as AR-15 rifles.

Firearm Safety Rules


First and most importantly, make sure you know and understand these universal rules for firearms safety: 

  1. ALWAYS KEEP YOUR FIREARM POINTED IN A SAFE DIRECTION.
  1. TREAT ALL FIREARMS AS IF THEY ARE LOADED.
  1. KEEP YOUR TRIGGER FINGER OUTSIDE OF THE TRIGGER GUARD AND OFF THE TRIGGER UNTIL YOU’RE READY TO FIRE.
  1. BE CERTAIN OF YOUR TARGET, YOUR LINE OF FIRE, AND WHAT LIES BEYOND YOUR TARGET.
  1. ALWAYS WEAR APPROPRIATE EYE AND EAR PROTECTION WHEN SHOOTING YOUR FIREARM.

Before you start taking your gun apart and working on it, make sure you are 100% positive that it is unloaded and that you do not have any live ammunition in the working area. Consult your owner’s manual or seek professional assistance if you do not feel confident working on your gun. 

This article will focus primarily on magazine base plate extensions and slide back plates for a Smith & Wesson M&P Shield 2.0. Each part is CNC-machined from T6 aluminum and then hard anodized black. The American Flag design you see on the plates is laser-etched, which means it will never wear off or peel, unlike paint and stickers. The metal itself is literally burned away to create highly detailed and precise patterns that will last a lifetime.

$25

at BastionGear.com

Prices accurate at the time of writing

Code: WARRIOR20 for 20% off

When it comes to upgrading your guns and changing out parts, I always opt for metal components versus the standard plastic parts that come with most modern semi-automatic pistols today. In the case of my S&W Shield 2.0, both the stock magazine base plate and slide back plate were injection molded from plastic. There’s nothing wrong with plastic and polymer parts in general, but they will wear out much faster than aluminum parts. Plus, you get a much more premium look and feel by going with metal.

How To Change Your Pistol Magazine Base Plate

Changing out your standard plastic magazine base plate with a Bastion Gear metal plate is super easy and will take less than a minute. Just use any object you have lying around that is small enough to depress the small indent on the bottom of the magazine locking plate. You can use a screwdriver, punch, Allen wrench, ink pen, or just about anything else that is strong enough to compress the spring enough to slide your old base plate off the rails.

Once you depress the locking plate enough to clear the base plate, gently slide the base plate forward in the same direction that the bullets orient in the magazine. It will only slide one way, so if it’s not working for you, try sliding in the other direction.  Make sure the locking plate is completely out of your way.

WARNING

The magazine spring and locking plate are under a lot of spring tension (that’s the whole point of the base plate), so make sure you keep your thumb over the locking plate and hold that spring tension. If you don’t hold the spring tension, the locking plate and spring will shoot out of your magazine body at nine hundred and eighty-six thousand miles an hour and inevitably hit something that will shatter on impact. Once you clean up all the broken glass and your shattered dreams of becoming a gunsmith, remember to keep that spring depressed next time.

To install your new metal plate, just reverse the whole process while you slide the base plate on the rails of the magazine body. The flat end of the base plate should meet up with the flat end of the magazine body. Again, it only goes on one way, so you can’t really mess it up. If your magazine spring and locking plate took flight at any point in the process, make sure they are oriented correctly and reinserted into the magazine body before you put on your new base plate.

$25

at BastionGear.com

Prices accurate at the time of writing

Code: WARRIOR20 for 20% off

In the case of this Bastion Gear Smith & Wesson Shield magazine base plate, it adds two major features to your magazine, plus the fact that it is solid aluminum. First, it creates a very comfortable grip extension and dedicated lip to rest your pinky finger. This is a big advantage toward properly maintaining a firm grip on your pistol. More fingers on your pistol grip means better recoil control for subsequent shots, especially if you’re shooting as fast as you can.

The second feature it adds is CNC-machined grooves in the sides of the plate that you can easily grab and hold onto if your magazine fails to fall freely when you try to eject it. The standard plastic base plate has small cutouts but no actual texture or grippy surface to hold, other than the smooth plastic of the plate itself. More surface area to grab translates into faster magazine changes if your mag doesn’t come out under its own weight. 

How to Change Your Smith & Wesson M&P Shield Slide Back Plate

If you’ve never changed your slide back plate, this can seem like an intimidating job that should be done by a trained gunsmith. The good news is, it’s much easier than you might think, and you can do it in about thirty seconds with nothing more than a small flat-head screwdriver. You don’t even have to take your slide off the frame, if you don’t want to take your gun apart.

First, eject your magazine, then lock your slide to the rear. If you look up into the back of the slide from the bottom of the gun, you’ll see, in the case of my Smith & Wesson, a white plastic tube. That tube is called the firing pin spacer sleeve, and its job is to keep the firing pin/striker properly aligned. The tube is under spring tension and is pressing into the back of your slide back plate.

All you have to do to remove your back plate is depress the firing pin spacer sleeve just enough to release the spring tension, and then you can slide your back plate off with just your fingernail. If you feel like you have to use a tool on the back plate itself, you’re most likely not depressing the spacer sleeve enough, or you’re trying to depress the firing pin itself rather than the sleeve. In either of those cases, if you try and use any tools on your back plate, you’re going to break something.

glock_exploded view with firing pin spacer sleeve highlighted

There is a small indention in the back of your slide back plate in which the spacer sleeve recesses. If you don’t clear the lip of that indention with enough pressure on the spacer sleeve to compress the spring and then try to pry on the back plate with a screwdriver, you’re going to either break the plastic sleeve, break your back plate, or both.

Don’t just start prying on things in your slide and hope it’s the right thing to do. Make sure you have a firm understanding of what piece you should be GENTLY depressing to get your back plate off. Each pistol is different, so the color, location, and shape of the firing pin spacer sleeve may be different than my Smith & Wesson M&P Shield 2.0.

Photo credit: How A Glock 43 Works – 3D Animation by 45Snipers

Once you get your old back plate off, installing the new Bastion Gear slide back plate is even easier. You can either do what you just did in reverse, or the easier way would be to depress the firing pin spacer sleeve from the back of the slide, while you insert the new back plate into the slots in your slide.

After the edge of the new back plate covers the spacer sleeve, you can stop compressing the spring and simply slide the new back plate into place until you hear it click. The audible click is the firing pin spacer sleeve properly seating into the back plate. That’s it!

Conclusion and Final Thoughts

The laser-etched back plates from Bastion Gear aren’t really adding any additional performance to your slide, other than the added durability of T6 aluminum versus the plastic back plate from the factory. The biggest advantage to upgrading your back plate is the customization factor that is available. Bastion Gear has dozens of different designs to choose from, including your own custom text or logo.

In the case of the Smith & Wesson Shield 2.0 magazine base plates, there are clear advantages and logical reasons to upgrade from the standard plastic base plates that came with your magazines.

The added grip length improves your ability to properly hold the gun, the CNC-machined edges on the sides for ripping a stuck magazine out are clearly better than the smooth plastic of a stock base plate, and the additional weight of the aluminum will help the magazine fall freely when ejected for faster reloads. The added size of the finger extension also gives you a little more wiggle room if you fumble your emergency reload and miss your grip on most of your magazine. (Practice more!) 

Both of these parts are really affordable options and easy to install to make your guns stand out amongst the rest. Laser-etching will last a lifetime and never wear, peel, or fade. 

This is my personal pistol. There are many out there like it, but with the customized features, I can easily spot mine from others now.

LEGAL DISCLAIMER: Our videos and articles are strictly for educational, documentary, and entertainment purposes only. Imitation or use of any products depicted in our articles and videos are solely AT YOUR OWN RISK. All work on firearms should be carried out by a professional, and all state and federal rules followed.

Leave a Comment

Your email address will not be published. Required fields are marked *

Shopping Cart

Search

Socal Links

Jump To...

The Warrior Solution Full Color Logo

WELCOME!

Want 10% Off Your First Order?

If you like what you see and would like to be notified when we add new products, new shirt designs, and new videos on our YouTube channel, drop your email below!

By entering your name and email address, you agree to receive news and promotional material from The Warrior Solution. You can cancel this subscription at any time. We never sell personal information or send spam email blasts. Read our Privacy Policy to learn more.